
After researching numerous layout approaches, and mocking up a number of them on paper and in Visio, I somehow landed back on a layout similar to my three Westfalia vans. All of our requirements combined were really only supported by this layout – particularly the open space requirement. The Westfalia layout delivers a 4’ x 4’ open space, which when combined with the space between the front seats allows for a decent amount of yoga, more space when 2 people are cooking, and a sense of openness when sitting in the back (and of course when the tunes are cranked, a nice dance floor!). When driving, the passenger sitting on the back bench seat (perhaps working at a table) can still feel connected to the driver and the road.
Key features:
The back of the bench folds up to create a high bed that is 60” wide and 75” long. The bed mattress is at 47 inches above the floor, creating a large amount of storage below while providing just enough space to sit up in bed as a couple
There is a wet bath with composting toilet and sit down shower to the left of the bench. The sit down shower uses the kitchen faucet and a wraparound shower curtain. An exterior shower curtain can be mounted outside of the kitchen window and the faucet passed through the window for outside showering.
A large 4.7 c.f. refrigerator is below the sink, and a 3 burner stove with oven to the right of the sink
A lot of storage
10 feet of overhead cabinets on the left side
6 feet of overhead cabinets on the right side
5 foot wide shelf over the driver’s compartment
Three drawers under the stove
Two large drawers under the bench seat
Two large bins accessible by lifting up the back of the bench seat
Storage for outdoor gear, tools, etc. in the garage area under high bed
Two tables using the Lagun pivoting table mount. The main table can be used for food prep, dining, or can be pivoted to the outside when the door is open. The front table can be shared by the two swivel seats, used for food prep, or used as a single workstation.
LED strips heavily diffused along both the upper cabinets/ceiling and below the cabinets along the wall. Task specific lighting over the stove and sink, at the head of each bed pillow, at the sliding door, and by the driver and passenger seats.
Here’s the layout showing the bed folded away for day use, both tables in use, and the two front seats swiveled:
Top view of floorplan
Here is a side view of the left side of the van:
Side view of floorplan
Living Room/Dance Floor
One advantage of this layout is the 4 foot by 4 foot open space. Most of the commercial Class B’s we looked at lacked this sense of space. With the 2 front swivel seats and 2 tables we can both be cooking at the same time, entertain another couple for dinner, boogie down on the dance floor, or do some yoga.
Galley
We love to cook. Or perhaps more accurately, we love to eat organic, healthy, fresh food with lots of veggies. Cooking is just an unfortunate side effect of that. To that end, we wanted the maximum refrigerator and oven capacity possible in our space. Although that limited countertop space, we could compensate by using our two Lagun mounted tables for food prep.
At 38.5”, the counter height is above standard. We are both tall people, and this height will both improve usability and give us more space. Having the sink above the fridge was not actually possible without adding a few inches anyway.

The Vitrifrigo 130L with external compressor was the largest under counter refrigerator we could fit in the space. It has a real freezer, which can be used to make ice to add to a soft cooler for longer boondocking trips. The external compressor frees up an additional .5 cf of space in the fridge, and makes it easier to actively ventilate. The compressor comes with it’s own fan, and when mounted above the fridge will allow me to add an additional 1” of insulation all around the fridge, including the back.

The Dometic Atwood 3 Burner Range was the smallest oven we could find, and Isabelle over at FarOutRide (another couple who like good food!) says good things about it. We’re not getting the optional cover - it reduces our counter space when open. We will have a cutting board cover that keeps the stove from rattling when driving, and is useful when parked as well.
The sink is just a typical 14x14x6 marine SS sink from Ambassador marine. I did have to get a very shallow drain to keep my cabinet height to 38”.
We considered a microwave with convection oven instead of the Atwood, but compact microwaves with convection ovens don’t work very well, and larger microwaves are real power hogs.
Toilet and shower
At our age we are both likely to be up once or twice a night to use the bathroom. A trip to the outside while camped in the city or in the rain is pretty awkward. So we knew we needed a toilet, but how to fit one in in a 148” long body?
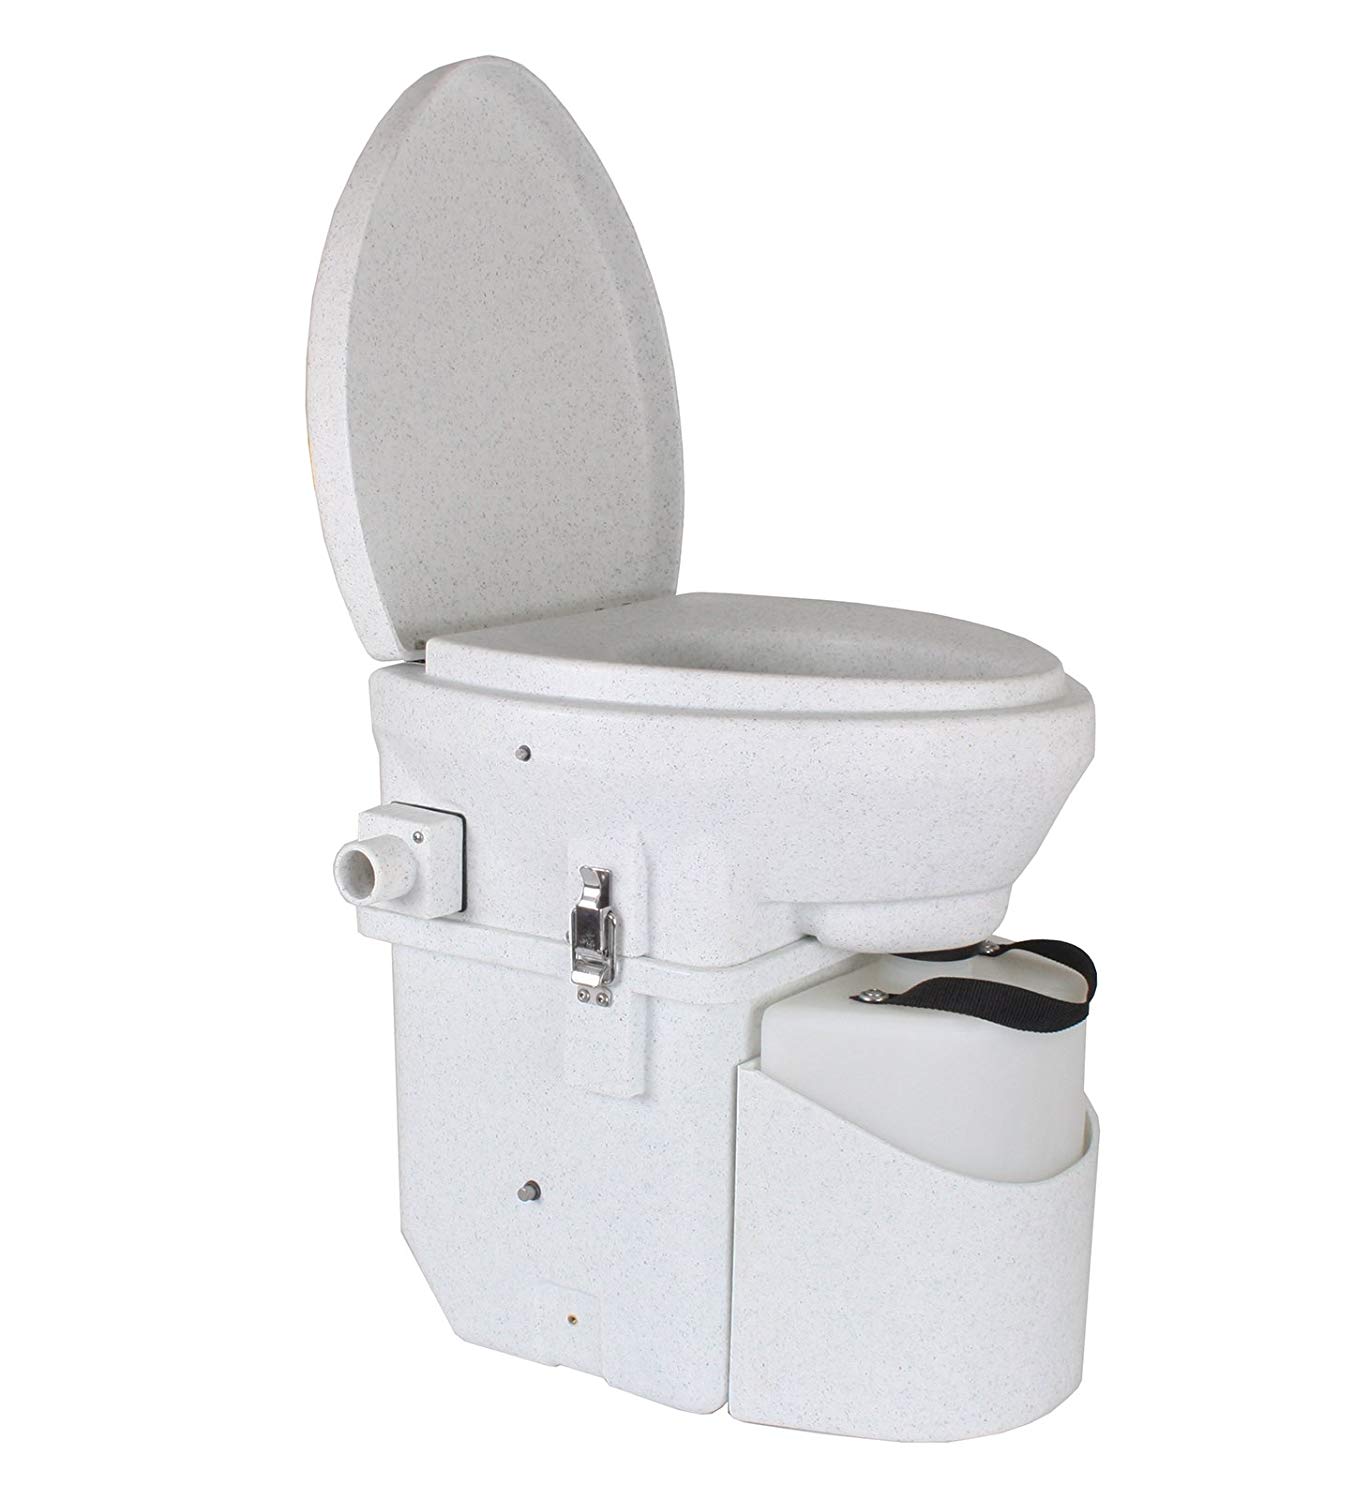
The most common choice is a cassette toilet, which can be brought out at strategic times and then put back in the cabinet. But we also wanted a Nature’s Gate composting toilet to reduce the smell, need to empty (we’ll only need to empty every 2 months or so), and composting toilets are bulkier and not made to be moved.
We definitely did not have the space for a dedicated bathroom. We finally decided on its current cramped location to the left of the bench seat. The toilet cabinet is covered with kitchen countertop, extending the workspace of the kitchen. The countertop is folded up to enter and use the toilet. The urine tank is plumbed to grey water, so never needs to be emptied, and removing it entirely creates more space in the cabinet. I’ve mocked up the whole thing in plywood, and it’s not too bad getting in and out. Definitely better than no toilet at all. That’s sort of becoming my mantra as I go through this process.
After this was designed, I realized that with it being situated next to the kitchen sink, a sit down shower would be an easy option. The only additional work is to make the toilet enclosure waterproof.
Bed
Ah, the bed. Incorporating an object that consumes half our living space when open is a challenge. We solved this problem with a variation on the Westfalia Rock ‘n' Roll bed. Instead of the bench seat becoming part of the bed, we just had the bench back lift up to extend the bed. The high height of the bed gave us an immense amount of storage space under the bed in the garage. Another design requirement for us was that the bench seat had to have shoulder seat belts and be as safe as we could make it for use while driving. And we needed the storage space under the bench seat, and not have it tied up with the typical commercial auto bench seat framing.
No one makes such a thing though. I’ll be fabricating the frame for the bed, bench back, and bench seat myself out of 1” steel tubing and 3/8” marine plywood. Getting this right is one of my biggest design and build challenges of the whole project.
The queen bed
The bed is not spacious. Using the full 60” width of the bed is possible when laying down and side sleeping (with 15” of clearance between the mattress and overhead cabinets), but when sitting up we’ll be limited to the 40” of width in between the two sets of overhead cabinets. Also, the bathroom cuts into the leg space of the left side of the bed. A corner cushion can be placed on the bathroom corner to create a full queen bed, but would have to be moved aside to use the head in the middle of the night. We’ll be mocking up these constraints in our bedroom over the next month to make sure this works for us.
We are sacrificing some space for a 7” thick 3 layer mattress - a dense layer at the bottom to prevent bottoming out, a medium density latex layer in the middle for comforming to curves, and a softer layer at the top for comfort. These things aren’t cheap. The quote for our specific needs was about $1200 from Mattress Insider.
Windows
We wanted windows - lots of windows. And we wanted storage. And a new president. But at least we got the windows.
The high mounted, opening and screened rear windows are critical for sleeping in hot climates. With the fan running over the galley, the two rear windows will provide a steady breeze over both of us.
The larger windows mounted on the sliding door and over the galley deliver a better passenger experience for those seated in the back, and a more open feeling on rainy PNW days.
We were torn between the CRL awning style and the Motion slider style. We ultimately went with Motion Windows, because they can be opened while driving, and the showerhead can be easily passed through the galley window for outdoor showering (but not while driving!).
I will need to fabricate some magnetic mount rain guards so that we can have them open in the rain as well.
Overhead Cabinets
The full length overhead cabs on each side of the van give us a lot of storage space. But there are some constraints that we had to work with:
These cabinets are high up in the van, and the added weight on unpaved, rough roads needs to be minimized.
They bulk up the interior, and done poorly can make the space feel crowded.
The framing shouldn’t impact usability - making it easy to slide plastic bins or tall objects in and out.
The framing and paneling should maximize storage - which meant that any cavities produced by the design should be internal to the cabinet.
It took a lot of thinking to create a design that was lightweight, maximized interior storage space, strong in a crash, and good looking. Key features:
Face is angled backward top to bottom to align with the curve of the van wall, creating a feeling of spaciousness rather than angular intrusion
About 13” front to back at the base
About 14” bottom to top at the front
Bamboo plywood doors that open to 107 degrees (to the ceiling), with softened edges, reducing the forehead gouging
I’m planning on 1/2” bamboo cabinet faces (the heaviest part of the cabinet), 1/4” marine ply base, and 1.5” x .75” rails. The total cabinet weight for the 10’ upper left is 52 pounds, and for the 6’ upper right is 35 pounds (including Blum hinges). I’m still kind of on the fence about the hinges - they are 20% of the weight of the cabinet, which seems crazy, but they sure are beautiful and functional.
I’ll go over the design details in a later post as I build them.