I was looking for a bike rack to carry two large, heavy, fat tire electric mountain bikes. We park the van for weeks at the time, and use the bikes for all of our transportation needs.
The bike rack had to be:
Durable enough to stand thousands of miles of pounding on washboard roads
High enough to not reduce departure angle
Not increase overall length too much and still allow us to park in city parking spaces
Allow either or both doors to open with minimal effort
Deter theft
There’s a great master bike rack thread here that gave me a great overview of the different options. Unfortunately, none of them met my criteria. All of the hitch mount racks reduced departure angle, rattled like crazy, and didn’t seem durable enough to take the off road pounding.
I then turned to door mount racks – and there were none.
I looked at what might be adapted to a door mount bike rack, and came up with two options:
Owl Vans Ford Transit spare tire rack
I chose the Aluminess rack as the starting point for the project, since Owl Vans never seemed committed to their version. In fact, they seemed to stop selling it shortly after my purchase. Aluiminess has a reputation for high quality engineering, the rack was rated for 100 pounds, and the fit/finish looked great.
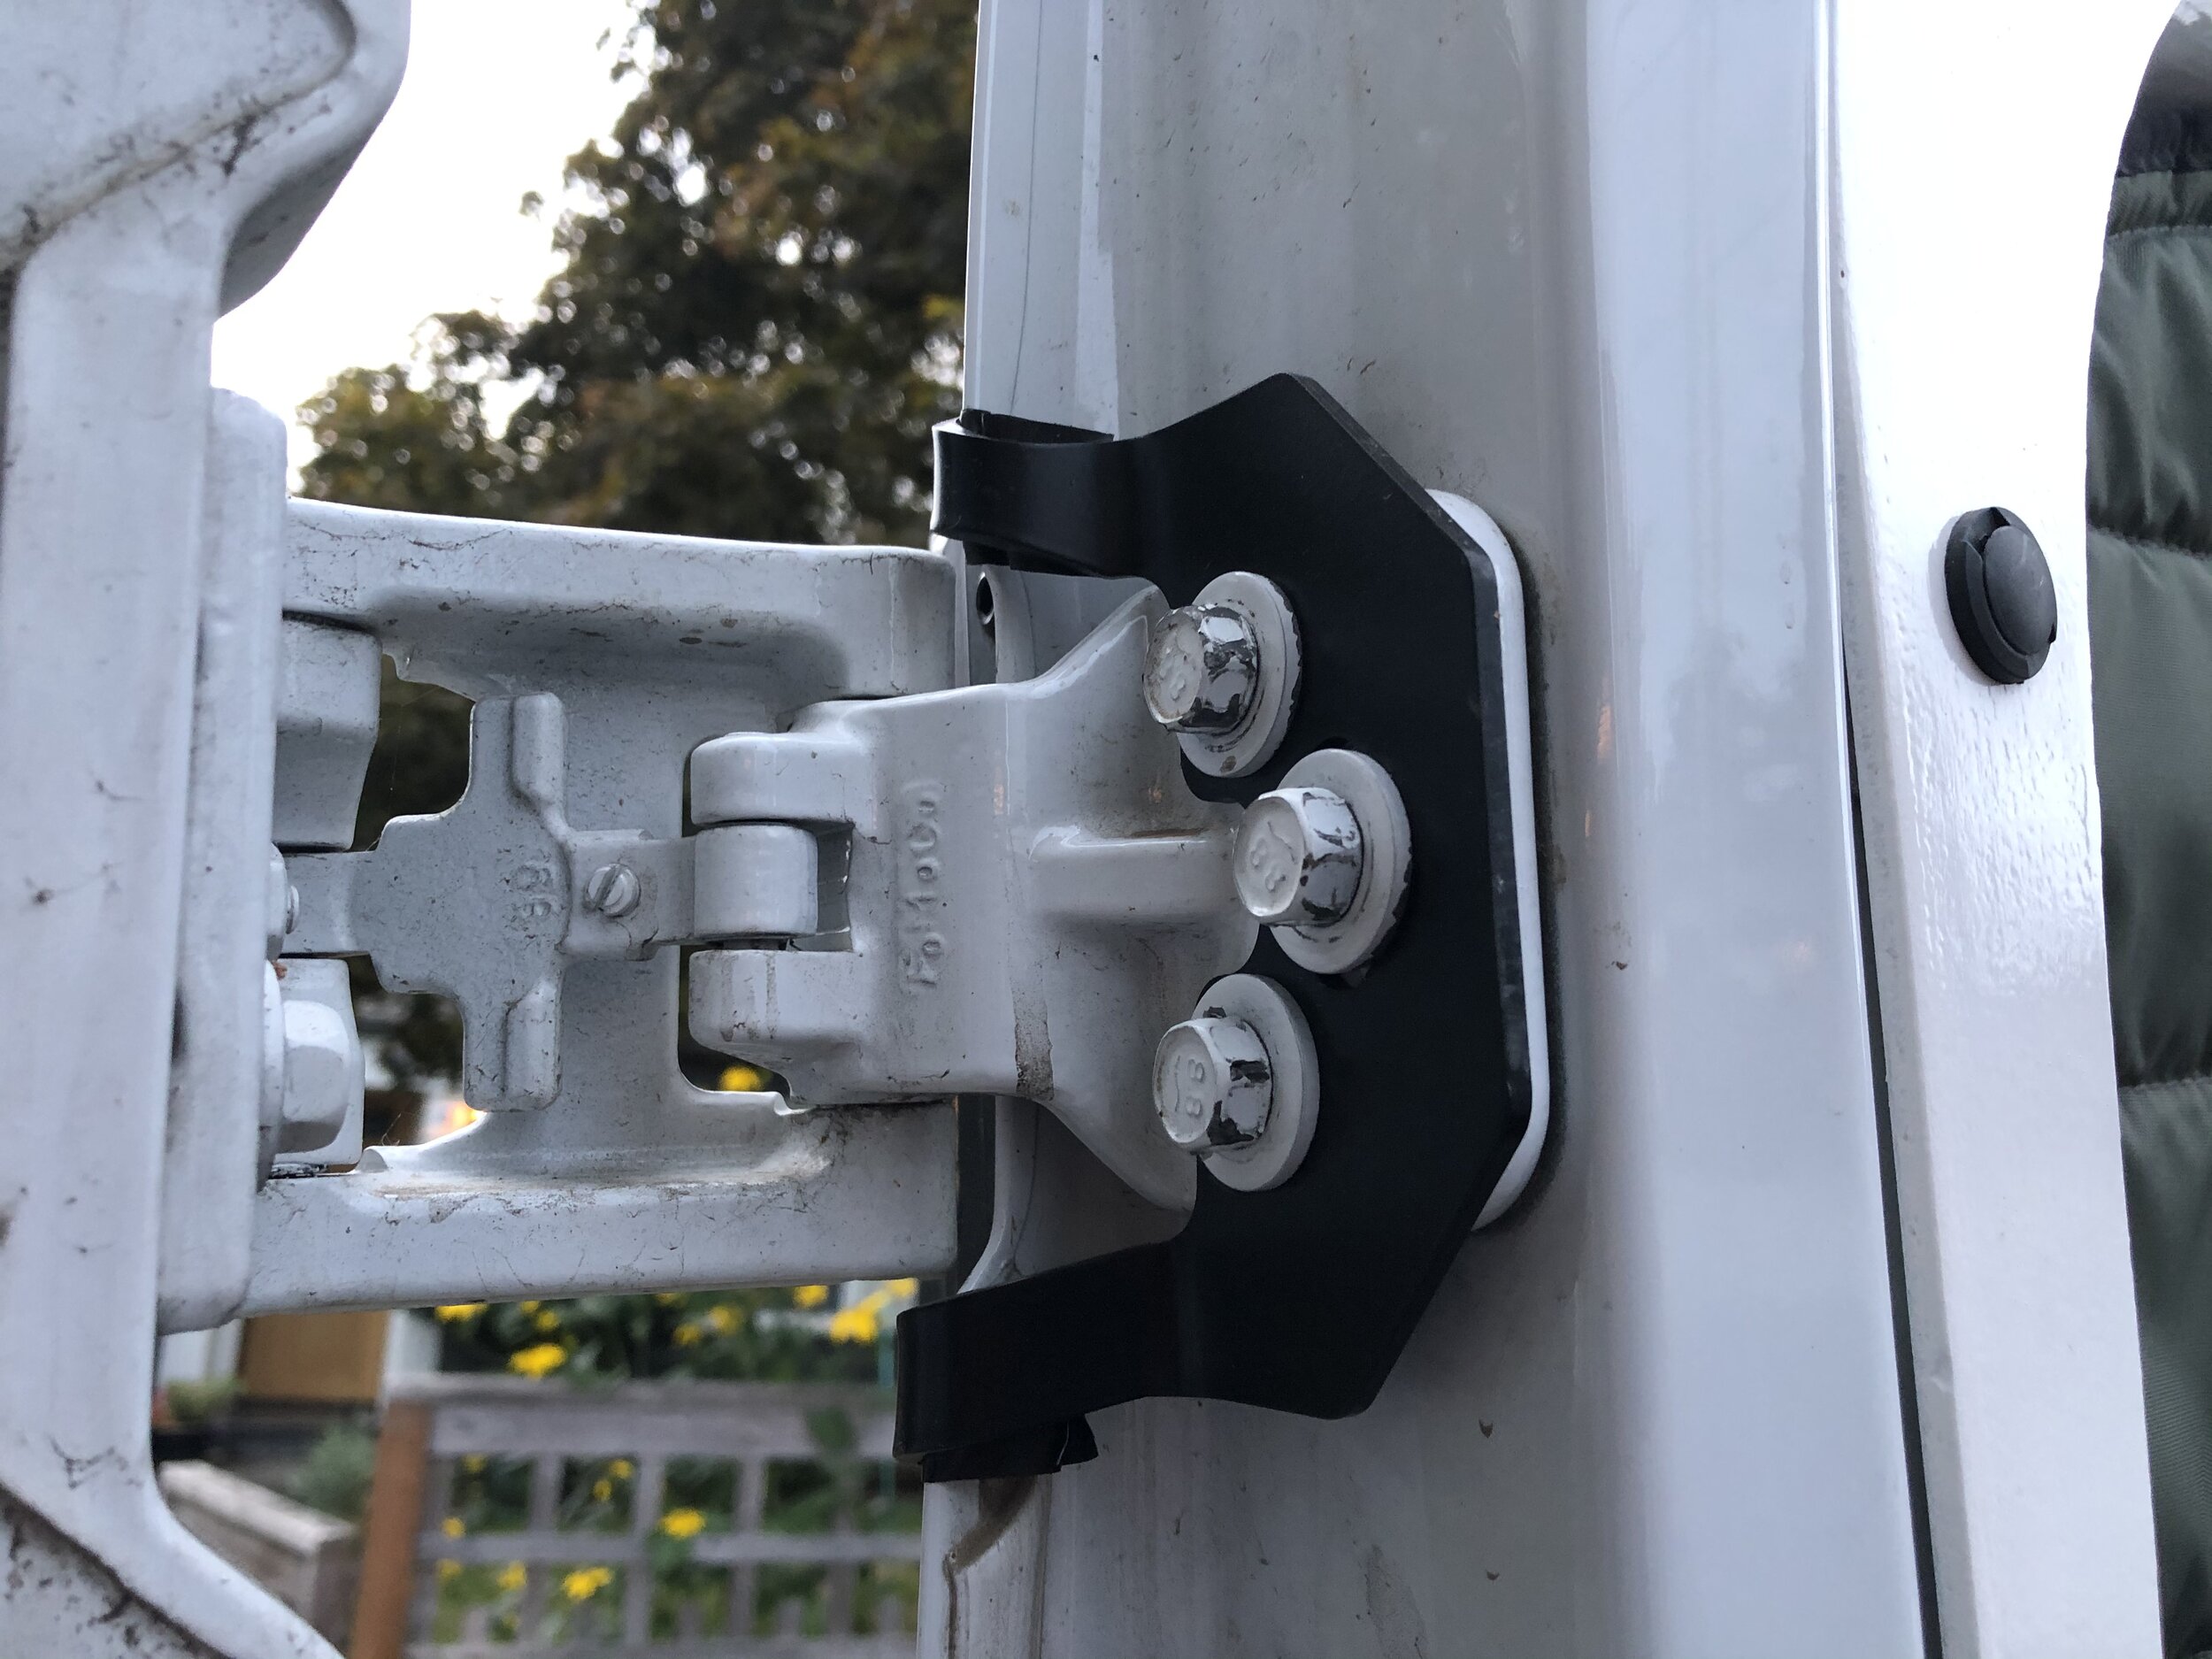
First I installed the racks. Aluminess has very few pictures of this rack on their site - I’ve provided some details of how it’s installed, and additional pictures in the gallery below.
Install four hinge brackets. Remove the hinge bolts at each hinge, put on a bracket, and install the same bolts back in place. The hinges are not moved, shimmed, or adjusted in any way - the bracket simply sits on top of the hinge between the hinge and the bolt head.
Remove the torx bolts on the passenger side door latch, install bracket, install Aluminess supplied longer bolts.
Remove the torx bolts on the dirver side door latch, install bracket, reinstall the Ford bolts
Bolt the rack to the brackets with the supplied bolts
With the racks on, I came up with a basic idea how to position the bikes. Since we sold our house, and live in the van, I have no shop. I had to find a local outfitter to do the work. In the time of Covid it was hard finding anyone at all, let alone someone with the skills to put together something that performed under tough conditions. I ended up hiring a local guy about 90 minutes away who came highly recommended, but who was very expensive. By this time, we had a scheduled trip down the Green River in Utah, and I had only 2 weeks to get someone to complete the project before we left town.
The results are in the pictures below.
The bottom wheel sits in the lower tray with the frame pointed up, forks to the outside.
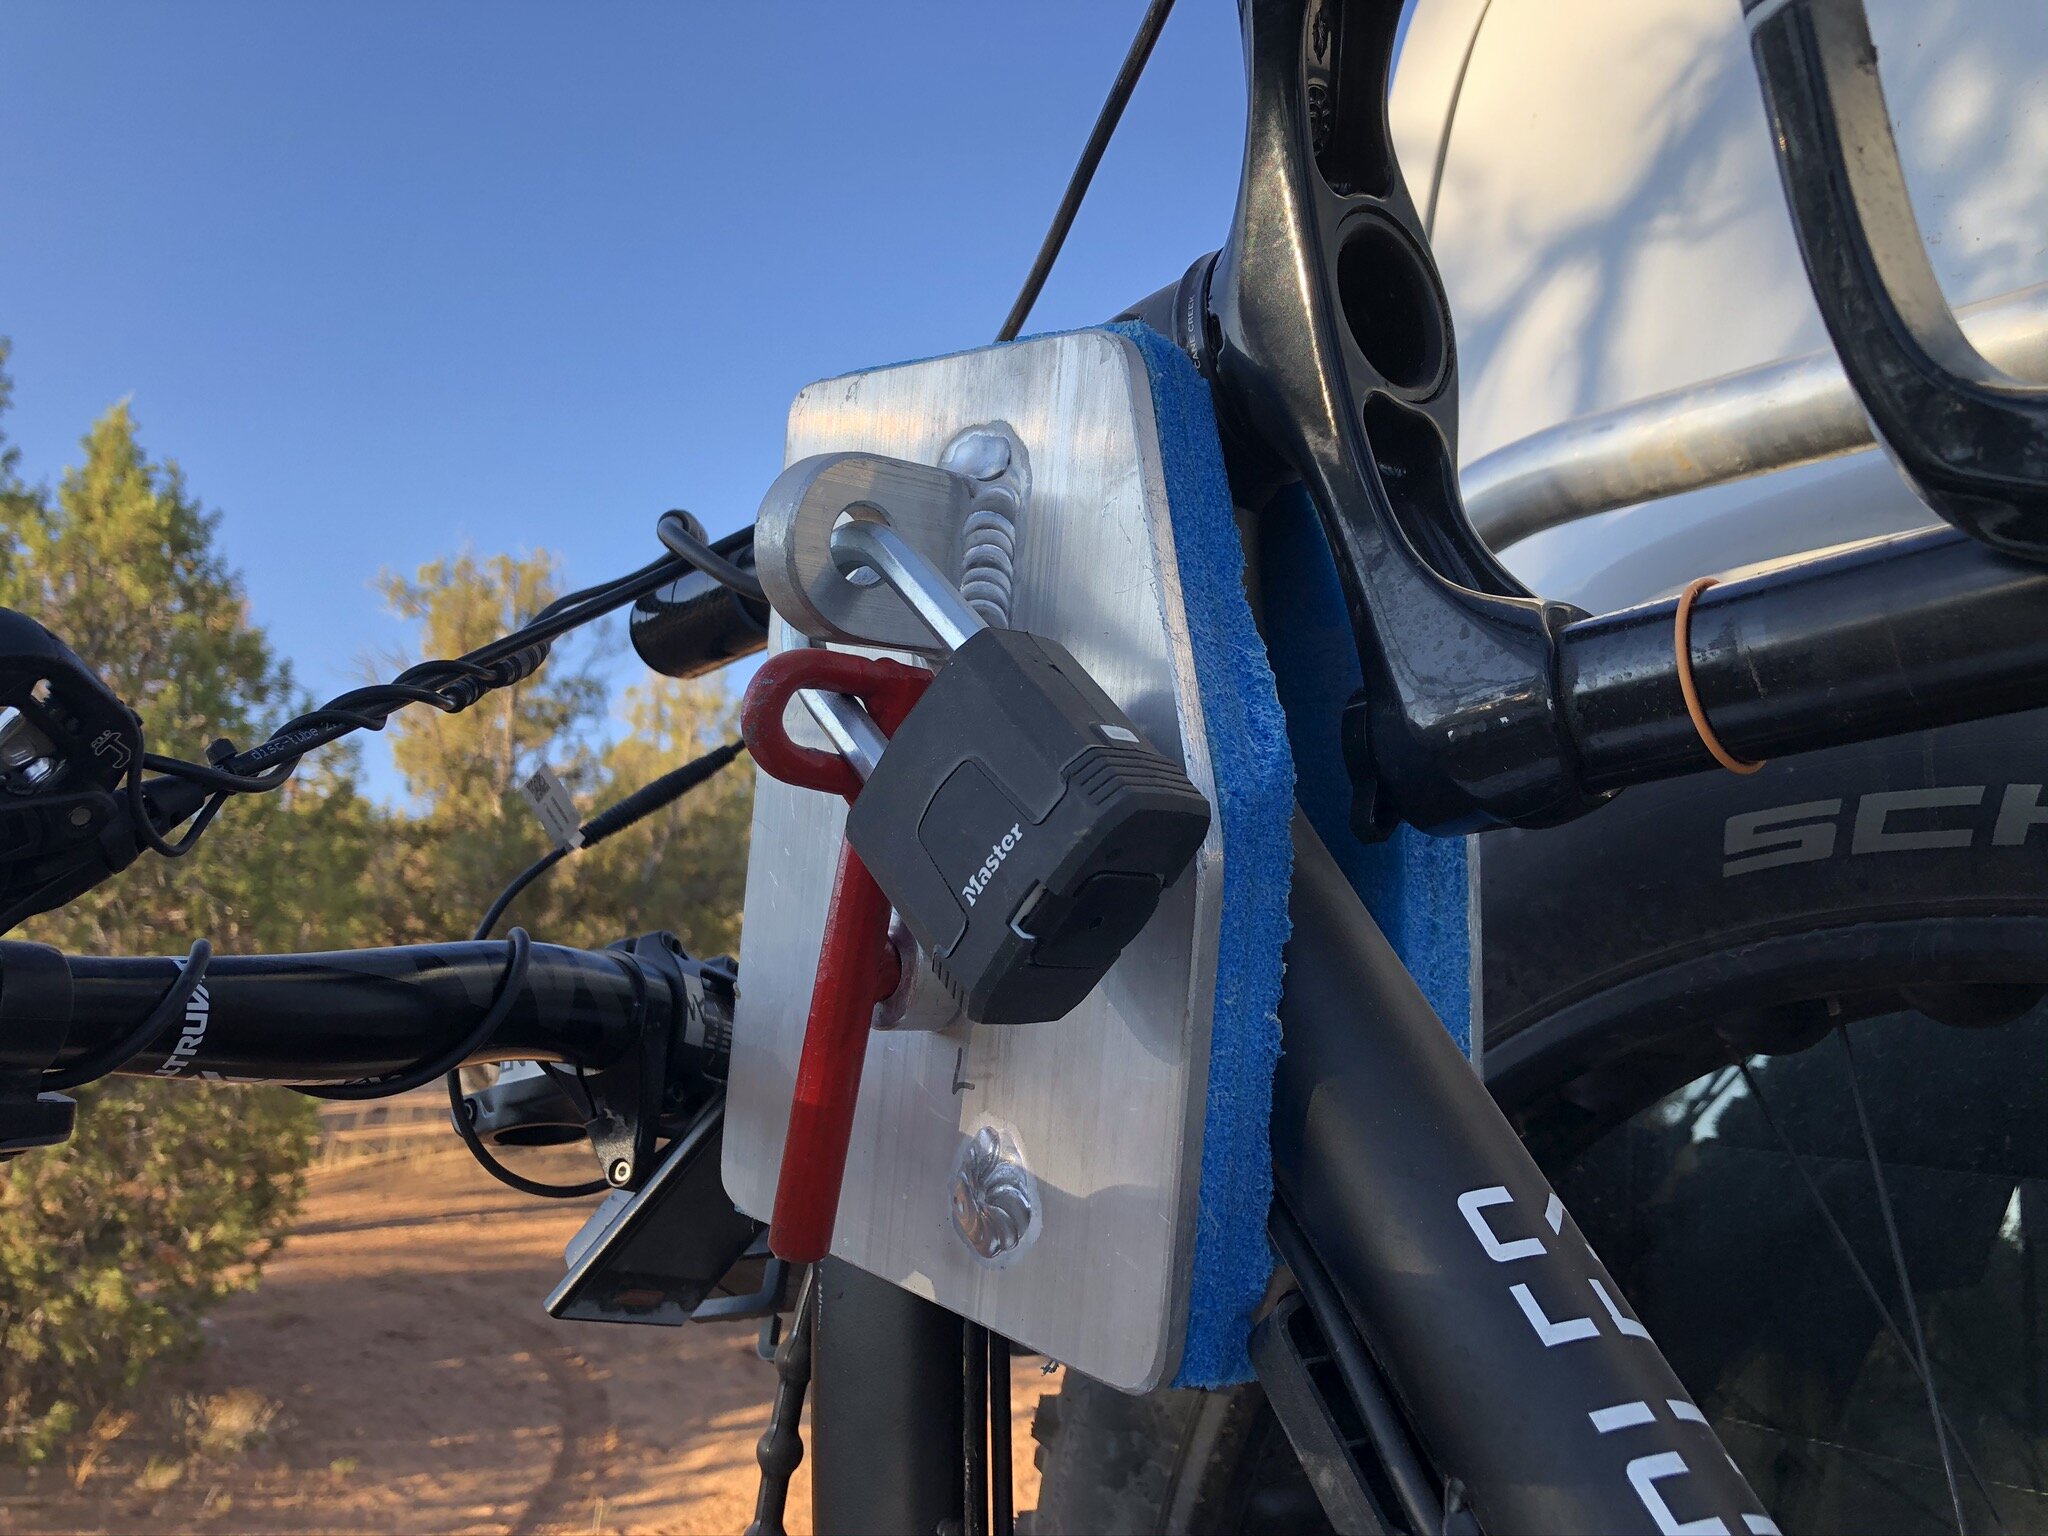
The headset is clamped between two aluminum plates lined with foam and locked.
The front wheel sits in the tray up top.
Both wheels insulate the bike from pounding by resting on the rubber.
I made some custom covers to deter theft and protect the bikes from weather and dirt
What I like:
He hit all of my criteria. This rack is totally bomber, low profile, lightweight, and rattle free
No maintenance – all aluminum
Reasonably good security
What I don’t like:
I couldn’t iterate on design with him – I dropped off the racks and one bike, we discussed approximately how it would work, and he went to work.
The forks and handlebars mount to the outside. The first time I put the bikes on, I realized the handlebars were sticking out <just> far enough to be at risk for getting hit by tree branches. I would have to remove them every time I put the bike in the rack. A PIA. But it did make for a cleaner look, and the covers were easier to sew.
The bikes partially block the brake lights and turn signals. If the driver directly behind me is close enough, they would not be able to see my right turn signal at a light. So for safety reasons, I had to install additional lights in the bumper.
The rear wheel tray could have been mounted a little lower, making it easier to hoist the bike into position.
I’m not sure how many of you will be interested in this because of the cost, and my specific criteria, but I thought I’d throw it up here anyway.